Connections you Need to makeon the rear of your box
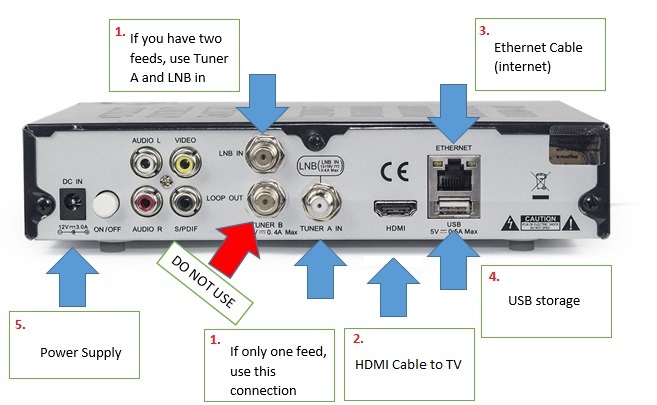
At the rear of your new satellite box we have five simple connections to make.
Ensure that the on/off button on the rear of the box is in the off position (out) before completing these steps
1. Connect to aSatellite Dish. This is the connection to the existing twin satellite cables which you would have removed from your old sky box and should look like this:
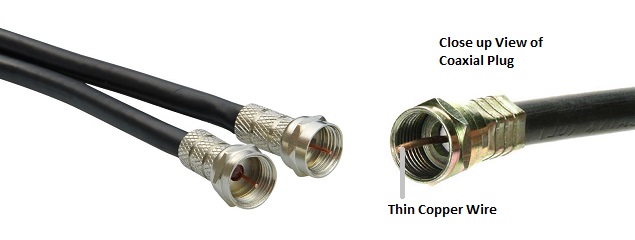
Ensure that this coaxial cable has the thin copper wire protruding a few millimeters beyond the centre. Connect both these cables to the plugs labeled "TUNER A IN" and "LNB IN" These cables can be fitted eitherway around and screw in clockwise.
The other end of these cables should be connected to your satellite dish outside.
2. Connection to TV. Connect the HDMI cable (supplied with your new box) to the socket labeled HDMI on the rear of your box
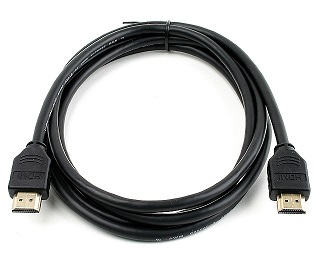
The other end of this cable attaches to the HDMI socket on the rear of your TV.
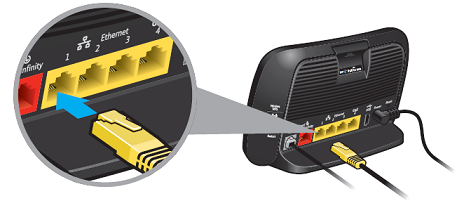
3. Connect to your Broadband. Next you need to connect an Ethernet cable from your router to the new satellite box. Your router should have come with a spare one of these or there may already be one connected to your old sky box. It may be a different colour, but the plugs will look like this
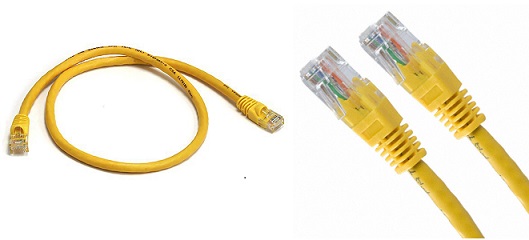
This cable connects your box to the internet, so needs to plug into the rear of your Router or Home Hub which will look like this.
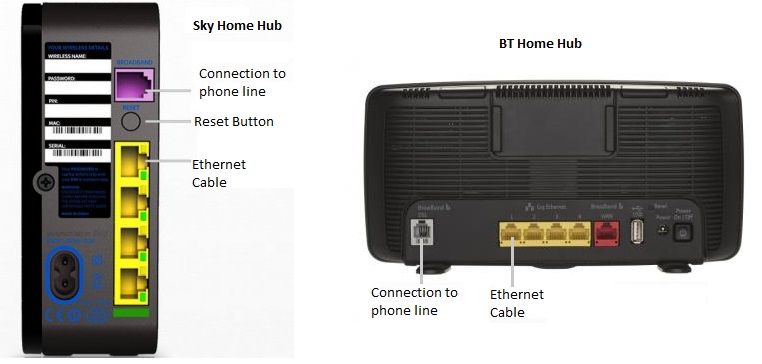
The other end of this Ethernet cable can plug into any of the yellow sockets on your router. Whatever make of router you have, these sockets should be coloured yellow like thesepictures.
4. USB Storage. Finally you need to plug in whatever type of storage you are using with your satellite box to save recordings. If your box came with a USB stick included you need to plug it into the socket in the rear marked USB. This should already be formatted and ready to work with your box.
5. Connect Your Satellite Box to Power. Finally you need to connect the power adapter which comes with your new satellite box. Plug it into the socket labeled power supply on the left rear corner of your box, and the other end into any power socket near to your TV.
Now press the power button on the rear of your satellite box and the front panel will illuminate with the word "BOOT". Ensure you have turned your TV to the correct channel to to receive the signal from your box. Usually HDMI1 or HDMI2. You will see a loading screen. Once this has finished booting it will change to BBC 1 and you are all set to go.
Remember all Sky channels are 3 digit numbers. To select your channel you need to press 3 numbers on your remote control.
Eg. BBC 1 = 101, Sky One = 106, Sky Movies = 301, Sky Sports = 401, Discovery = 520